

Back in the '80s, making bracelets from safety pins became a very popular activity. It was an easy and engaging craft for young girls, and teenagers would often get more intricate designs for a greater challenge and a funky finished product. If you go to a thrift shop, you may come across a kit to do this, and it may bring back all your childhood memories and how much fun you used to have doing these if you were a child of the '80s. You can still get kits that have everything you need to make safety pin bracelets, but since it is literally only made from safety pins and beads and a few other objects for more creativity, you do not actually need to acquire one of these kits.
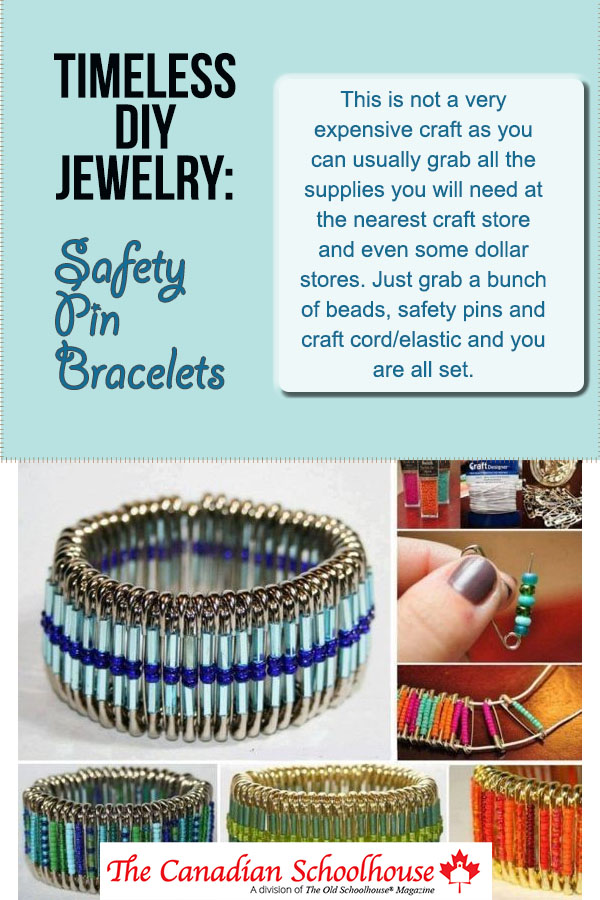
This is not a very expensive craft as you can usually grab all the supplies you will need at the nearest craft store and even some dollar stores. Just grab a bunch of beads, safety pins and craft cord/elastic and you are all set.
We've compiled lots of ideas and designs for you on our Safety Pin Bracelet Ideas Board on Pinterest, so go check it out and and plan some creative time with your kids!
You will need:
- 1" safety pins (26 total)
- Small seed beads
- Elastic cord
- Scissors
Place all the beads into a bowl as you are working so they do not roll around.
Instructions:
- Make sure you have all the supplies ready to be used and organized.
- Place 5-6 small beads onto each safety pin. Make sure you know what pattern you want your bracelet to have before you put these on. For example, pink, blue, pink, blue, etc.
- Cut the elastic to the size you need. Measure it by wrapping around your wrist 3-4 times. Make sure you are generous with how much you cut.
- Thread the cord through both ends of the safety pin. Make sure that the safety pin ends up in the middle of the cord.
- Then put another safety pin but facing the other direction this time. Continue this pattern until you have used all the safety pins.
- Pull elastic cord gently so nothing falls off and cut the end so you can tie it to the other end.
- Tie one end of elastic cord to the opposite end of the same cord. Tie the other elastic cord to the opposite end of it. Turn the bracelet inside out. Then tie these ends to each other so the bracelet is secure and won't come undone. Cut extra elastic off. Make sure to put the bracelet back to how you want it.
Enjoy making and wearing these fun bracelets - and they make great gifts too!


"Train up a child in the way he should go and when he is old, he will not depart from it" (Proverbs 22:6).