


It’s Time to Start Seeds!

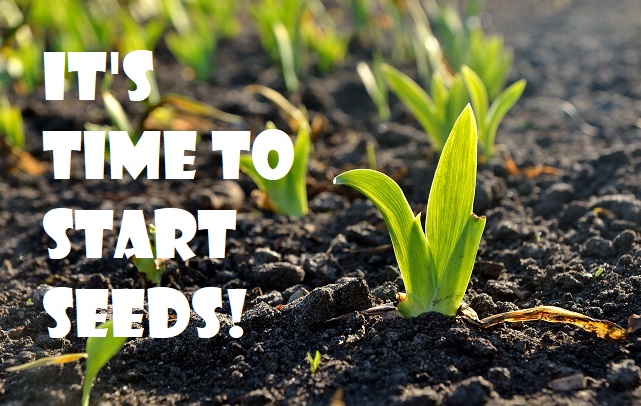
As spring approaches, I am looking forward to what has become a homeschool ritual for us at this time of year—starting seeds. When my son was in kindergarten, I decided that would be a good science lesson for him. However, it became a learning process for me as well.
After growing seedlings indoors, we ended up transplanting them outdoors after the ground thawed. We learned about caring for the garden, when to harvest the fruit and vegetables, and finally, how to save seeds for the next year. Each spring, we began the process again and tried new things. We experimented with starting the seeds in different types of containers, growing various types of plants, and planting them in the garden in new ways. We have tried a raised pallet garden, container planting, and a hugelkultur. We learned how to compost. We fought with powdery mildew, blight, pests, and made homemade sprays to deal with some of these issues. We learned about pollination and even hand-pollinated some squash. We expanded our garden last summer and let the area that comprised the original garden lay fallow. This summer, we will test whether that has a positive impact on our plants.
If you would like to try seed-starting with your children,
1. Find out your plant hardiness zone to figure out what seeds to plant and when.
2. Gather supplies.
a. Pick a container. You can order a seed-starting kit, use egg cartons, Styrofoam cups, peat pots, etc.
b. Pick seeds. Tomatoes, peppers, eggplant, and some flowers are often started inside.
c. Pick up some seed-starting soil. You can make your own or buy it, but it is different than regular potting soil. d. Download one of the free plant life cycle worksheets or seed journals that are available online to teach your children about the process.
3. Place some soil in your chosen containers, water well, and add a seed to each. Push carefully into soil. Cover with plastic wrap. Prick small holes in the plastic wrap as well as the bottom of your containers for drainage. Keep in a warm spot or place on a seed heating mat.
a. Label each seed! We write on plain popsicle sticks that we insert into the soil.
b. Water often, but use something with a gentle flow, to avoid displacing seeds. We’ve used a spray bottle or a water bottle with a small hole made in the cap.
4. Once the plants emerge, remove plastic wrap and move into a sunny spot.
5. When the seedlings get their second pair of leaves, move to larger pots with plenty of compost.
6. If you are going to transplant to the garden, harden them off about a week before planting.
Of course, not everyone has a backyard that is large enough for a vegetable garden. One friend of mine starts seeds with her children indoors, and they watch the seedling grow, but the process ends there. Another grows her plants in containers. There are many ways to incorporate it into your homeschool, regardless of whether you live in a rural or urban area.
I have found it to be such a rich learning experience. Not only is it hands-on, but it inspires awe in the perfection of God’s Creation and His provision for us.
Heather Eberlin is a married mother of four children, ranging in age from six to twenty-five. She is currently homeschooling her two youngest children and has felt called to share her journey in order to encourage others. She in an amateur gardener who is amazed at the things that God’s creation reveals when you take the time to pay attention to it. You can follow her at Musings from My Garden.


SHARE TOS ON YOUR PAGE!
GRAB OUR BUTTON HERE-
![]()