


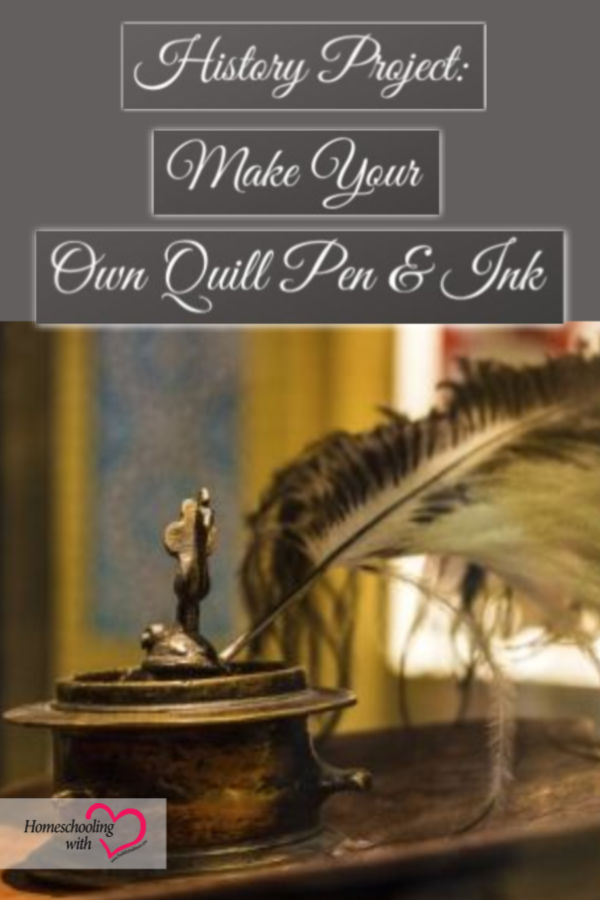
History Project: Make Your Own Quill Pen and Ink


We’ve been studying the early modern period this year in our homeschool, so we decided to do a project that would help us to experience what life was like during this time in history. We wondered how much more work it may have been not to have a modern pen to write with but to use a feather quill instead.
I found instructions for making ink to use with a quill. The supplies you will need to do this activity are
- ½ cup of berries (any kind)
- ½ teaspoon of vinegar
- ½ teaspoon of salt
- Some water, if needed
- A small jar to keep your ink in
You start by taking your berries and placing them in a strainer. Put a bowl underneath and press down on the berries with a utensil so that the juice flows through the strainer. When you are finished, add the vinegar and stir well. Next, add the salt and stir until all ingredients are combined. If your mixture is too thick, you can add a little water to thin it. We used some black raspberries that we had collected from our garden last summer and frozen. We defrosted them the day before and did not need to add any water. When the ingredients are combined, use a funnel to pour your ink into a small jar for safekeeping. The salt should help keep it fresh for a while.
An interesting twist on this project could be to gather several small jars and make different batches with a variety of berries. Then, you can compare the colors when they dry on the paper.
We purchased a quill pen to use with this project when we took a field trip to a historical society. If you would like to get truly authentic, though, you could make your own. This is what you’ll need:
- Turkey or goose feather that is about 12” long
- 16 oz. soup can that has been washed and dried
- Sand
- Craft knife
- Fine grit sandpaper
- Felt-tip marker
- Cuticle scissors
- Tweezers
Pour the sand into the can and heat it up in the oven for 20 minutes at 350°. Take the can out of the oven and push the tube of the feather down into the sand. Leave it there to cure until the sand has cooled completely. This will make it more flexible. Take your knife and scrape some of the plume off to leave room where you will hold the quill to write. Then, use the sandpaper to sand the scraped area until smooth.
With the felt-tip pen, put a dot on the tube of the feather about 1” from the tip. Put your feather down with the tip pointing away from you. Using your craft knife, cut a steep angle away from you, beginning at the dot you made. Check the inside of the tube. If there are any membranes, remove them with the tweezers. In the bottom center of the opening, cut a slit on the side that will be facing you when writing. The sides of the opening should be shaved until they are slightly curved, tapering towards the tip. Finally, use the cuticle scissors to cut the tip at an angle that resembles a fountain pen.
An interesting fact that we learned during this project was that letters in Western calligraphy are shaped the way that they are, with a mixture of thin and broad strokes, in part because our ancestors wrote them with reeds or quills, and they were designed to work with those instruments. Letters in Eastern languages, however, are shaped with broader strokes because they were painted with brushes instead.
We found writing with the quill to be tricky, and it helped to give my children a glimpse into what life was like in the early modern period. Depending on the age of your children, you may have to cut and shape the quill for them, but even little ones can enjoy pressing the berries and mixing the ingredients for the ink together. If your children enjoy hands-on projects, as mine do, I encourage you to give it a try.
Heather Eberlin is a married mother of four children, ranging in age from eight to twenty-seven. She is currently homeschooling her two youngest children and has felt called to share her journey in order to encourage others. She is an amateur gardener who is amazed at the things that God’s creation reveals when you take the time to pay attention to it. You can follow her at Musings from My Garden or download her free Homeschool Organizational Forms here.


SHARE TOS ON YOUR PAGE!
GRAB OUR BUTTON HERE-
![]()